Showing posts with label Tutorials. Show all posts

Thursday, June 6, 2013

Victorian Sunbonnet by Sarah Jane


Like I mentioned in my last post, I came across Sarah Jane's Victorian Sunbonnet on Pinterest.  I wanted to try making it, but didn't see any instructions. . . until I looked deeper and saw she actually had a tutorial!  I was tickled; however, it was only in an adult size.  I also wanted to be able to print it, so not only did I convert her 4 tutorials to a pdf to print, I added some additional sizes here.  She thought it was great to share it. (The colors in the pdf are a little weird---probably due to a few conversions I had to go thru to get it on here).

To shrink it down, I found a post at idrawdigital which describes how our proportions change as we grow.

Did you know that the height of your head increases by 3 inches from the time you are an infant to the time you are an adult?  So, using head height with an adult size as 100%, a 1 year old is 67% his full size.  By the time he is 10 years old, he is 83% his full size.  I wish I could have found head circumference stats to also compare, but couldn't.

So, I reduced Sarah Jane's pattern to 90%, 80%, and 70%.  I thought 70% would range from ages 1-3, but it may be more of a 1-2 size.  I was hoping the 80% size would fit ages 5-10, and 90% would fit ages 10-15, but since I haven't actually made them, and the bonnet turned out smaller than I expected, I'm not sure. However, I'll provide you with the reductions anyway.  The measurements reflect the pattern pieces in their folded state.  You will need Sarah Jane's tutorial to complete this pattern.


Here are the pieces cut and unfolded.  


I should have used self bias tape on the inside so it would be more discreet, but store-bought bias tape sure was convenient.  I could have put a tie in the back like I did in Liz's slat bonnet pattern, but decided with this one to put an adjustable string in the inside.  I also cheated and used heavy interfacing, rather than batting. I did, however, quilt it, but you can't tell in the pictures.  When I make another, I'll finish the raw edge of my brim the same way as in my bonnet tutorial on here.  I don't know if it's period correct, but it sure looks nicer than whip stitched raw edges.

I'm really, really impressed with these last projects.  My work has improved so much over the years.  Today I looked at this bonnet and thought, did I really just make that??


***If you need the PDF, leave me a comment and I can send it to you directly.***

Wednesday, May 8, 2013

Infant's Horseshoe Cap


I had even more fun today trying out the Child's Horse-Shoe Cap from The Workwoman's Guide on page 21.  I've changed the name here to Infant's Horseshoe Cap because the size is more for a baby, rather than a child.  Again, I've used contrasting thread so it's easy to see my stitching.


1.  Cut out your pieces.  It's easiest with a pattern.  I tried drawing a pattern on line, but it just didn't work as well as I would have liked, so I drew one up and scanned it.  The only problem is that no matter what I do, it prints about 3/8" too small. So, when you cut, just make everything 3/8" bigger!  I've marked how big everything should be, so you can compare how yours prints out to a ruler.  Luckily, though, it doesn't have to be exactly perfect (you can see my curves aren't even exactly like the Plate, but it still turns out cute).


2.  Add your runners (small casings for string to run trough to be tied and adjusted), "The cap is made up with two or three runners in front."  Hem the front edge.  (Don't you love that my iron leaked rusty water on my fabric?  So glad I was just testing in muslin!)


3.  Gather the back, mark the center.


4.  Sew the back and the brim right sides together, matching centers.


5.  Hem the bottom.  Allow for a string to be run through.  Add a 1" ruffle all the way around ("the frilling is one inch deep").


From the side:


The first size is little!  Maybe 0-3 months?


Here is my 14-month old in the second size.  Once I add the 1" ruffle and a neck tie I think it will be just right.  I only ran the string through the back bottom, but will along the top front runners, too, in the final product.


The difference between the first and second sizes:


Poor Infant's Cap: Easy Make, Easy Wash


I've been wanting to make a new cap for the baby out of better fabric (lawn instead of muslin).  I even learned some new hand-sewing techniques at Liz Clark's day cap class that I've been wanting to try out.      So, I went to the Workwoman's Guide and found this Poor Infant's Cap.  Actually, I gave it that name; it doesn't even have a name in the book.  It was really easy, but it is REALLY small---probably for a teeny-tiny baby!  So, I'm really glad I did a muslin test run first because it definitely won't fit my 14-month old.  As a larger size was not given, I'm not sure that this kind of cap would be used for an older baby.

In my test-run, I used contrasting thread so you can see where I ran my stitches.  Here's how I did it, with both the original instructions and my interpretation.

Original: PLATE 2 FIG 12 13 This is much used by the poor, and is easily made and as easily washed. 

Original: Take of the material a piece 6 nails down the selvage and 3 1/2 nails wide. 
Translation: Cut a piece along the selvage 13.5" by about 8" (my picture does not follow the selvage; it should be cut the other direction).


Original:
Double it, letting D be the doubled part.
Translation: Fold it in half.

Original: Sew up the back from A to C leaving a small hole or button-hole at the top C;
Translation: With right sides together and your fold at the top, stich down one side to form the back of the cap leaving a small gap at the very top (next to the fold) and another small gap half way down.  

Original: make a runner all round the front and behind, at half a nail's distance from the edge, which is hemmed with a very narrow hem to form a frill; also lay in a runner from E to F;
Translation: About 1" in from the edge on the right side of the fabric, sew a small casing along the bottom and front edges of the cap. Sew another casing along the front edge of the cap about about 1 1/4" in from the first casing, stopping a little over an inch above the bottom edge of the cap on either side. Sew a narrow hem along the front and bottom edges of the cap to form a frill. (The frill is very minor. If you cinch up your strings to make more frill, the cap is even tinier!)


Using a blunt needle, run 6 strings through your casings securing one end (see top drawing and below picture for placement). If you are hand sewing, I'd just hand sew my strings into my casings as I go.

Original: next, sew a bobbin at B, letting one end of the string hang outside and the other being pulled through the seam, remains inside the cap. This end is carried up and brought out through the hole at C (see the dotted line in the Plate which represents the top inside); when worn, the tapes, on being tied together at B, draw up the cap into shape, and if neatly arranged and pulled out with the fingers, it looks very neat and pretty. (See Fig 13) Some put a loop of bobbin inside at B, which on being brought out through C, fastens to a button at B, on the outside.
Translation: Run a tape (I used a ribbon) through the little holes you left in the back of the cap. Secure one end at the back center; pull the other end to tighten up the back. Tie the ties together to keep the shape. You can also put a button on the outside of the cap where you can secure your long tie. For ease, I just left two long ties and tied a bow.

Add chin ties.


Tuesday, January 29, 2013

Covered Buttons from Metal Washers


Here are some awesome instructions on how to make covered buttons from washers from Pastoral Symphony Farm.  Thanks Mrs. G!

Sunday, July 1, 2012

Monday, March 28, 2011

Man's/Boy's Shirt Tutorial (Simplified)

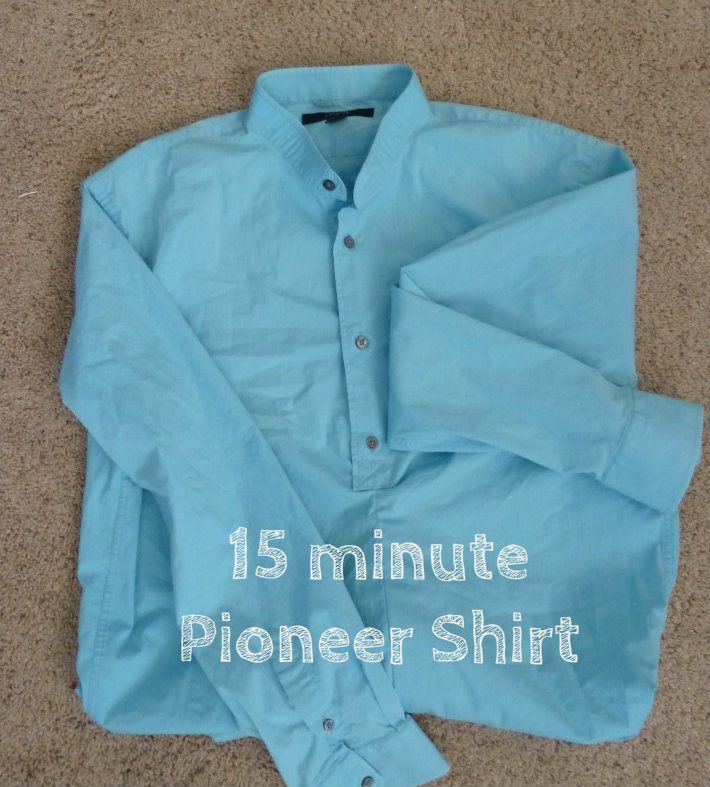
I found a Pioneer Man's Workshirt on line several years ago from The Mountain Man's Sketch Book and have made it in different sizes over the years.  I don't really need this size yet, but thought I'd make it so I could create a man's (or boy's) shirt tutorial.  I don't know if The Mountain Man's Sketch Book is a credible source. I haven't done my research.

From the get-go, you should know:

  • I found in trying it on myself that if I button it, it is rather choking!  If I unbutton it, and let the shirt fall to to the back, it fits more comfortably.  I'm surprised my little boy has never complained of the neck!  Maybe, though, the shirts he has worn were big enough on him that he didn't notice the ill fit.
  • I found this version of the pattern that seems to have more instructions and more of a neck cutting guide -- so it might be better than the version I used.  I'd like to try something from The Workwoman's Guide also, but thought I'd stick with something I was familiar with for now.  Perhaps I'll actually buy a pattern some day, but this will suffice for now.
  • The original pattern calls for a facing for the neck opening.  I've made it that way in the past, as well as tried some other methods, but this time I totally cheated -- you'll see. I didn't even use a facing.
  • You're also supposed to cut a slit in the sleeve for the wrist opening, but again I cheated for simplicity's sake and just left the arm seam open a few inches near the wrist.

The dimensions for this pattern at full size are on the downloads, but if you want to reduce the size, here are the dimensions:

75% (this is the size that almost fits me -- I'm about 5'4")         
Body          22.5" x 49", with the center 17" being reserved for attaching the sleeve (leaves 16" at either end)
Neck          7.5" wide maximum x 3" high maximum*
Neck slit    7.5" deep from the bottom of the neck curve
Sleeve        18" high x 20.5" wide -- the 20.5" is the part you gather)
Sleeve slit  5.25" in from the right edge of the sleeve when laid flat, cut 3.75" deep
Collar        17" x 3"*
Cuff           8.5" x 3"*
Facing

65% (boys' 7/8)   
Body          20" x 42", with the center 15" being reserved for attaching the sleeve (leaves 14" at either end)
Neck          6.5" wide maximum x 3" high maximum*
Neck slit    6.5" deep from the bottom of the neck curve
Sleeve        15.5" high x 18" wide -- the 18" is the part you gather
Sleeve slit  4.5" in from the right edge of the sleeve when laid flat, cut 3.25" deep
Collar        15" x 2.5"*
Cuff           7.5" x 2.5"*
Facing       3.25" x 8.25", with a slit cut 6.5" deep from the top

55% (5T)
Body          16.5" x 36", with the center 12.5" being reserved for attaching the sleeve (leaves approximately 12" at either end)
Neck          5.5" wide maximum x 2.5" high maximum*
Neck slit    5.5" deep from the bottom of the neck curve
Sleeve        13" high x 15" wide -- the 15" is the part you gather
Sleeve slit  4" in from the right edge of the sleeve when laid flat, cut 3" deep
Collar        12" x 2"*
Cuff           6" x 2"*
Facing       3" x 7", with a slit cut 5.5" deep from the top


* I'm sure you could keep your collar and cuffs bigger (keep the width the same, but increase the depth so that you have a bigger collar or cuff).  You could also leave your neck hole bigger, rather than reducing it.  Kids' heads are still really big in proportion to their bodies!


Here's how I did it:

1.  Cut or tear the fabric out according to the desired size.  Next time, I may try shifting my neck hole a couple inches to the front to see if that helps alleviate the choking neck line.  Any other suggestions?

2.  Run two gathering stitches (long straight stitches) along the edge of the sleeve (at 1/2" & 1/4").  Gather the sleeves down to fit the appropriate area on the shirt body (according to the pattern dimensions).  Attach the sleeve to the body, right sides together, with a straight stitch 1/2" from the edge of the fabric.  You can zig-zag the edge, or to be a little more authentic, just stitch a second straight stitch 1/8" again closer to the edge. 


3.  Fold the shirt in half and sew your side and underarm seams. I did not sew completely to the wrist, but stopped a few inches short to leave an opening in the seam for a wrist opening (I didn't want to have to bind wrist openings).  Again, you may also zig-zag your seam, or do a second row of straight stitching. 
Here are the few inches I left open in the seam:
I folded the raw edges under 1/4" and again 1/4" and pressed and stitched around the opening:
From the inside:

4.  Run two gathering stitches along the edge of the sleeve.  Pull threads to gather the edge of the sleeve down to fit just inside the wrist band (leave 1/4-1/2" of the wristband sticking out on either side of the gathered sleeve.).

Stitch at 1/2".

Press the wristband away from the sleeve.  Press the short side edges toward the wrong side and then press the long edge also toward the wrong side.
Fold the wristband in half and carefully press and pin.
Stitch along one short side of the wristband, along the long, open side, then along the other short side to close. 
 I made a loop with a button for the closure.
  Repeat on the other sleeve.

5.  Now it's time to finish the neck.  Instead of cutting a facing for the head/neck opening, I just cut away horizontally from the bottom of my vertical slice about 1/2" to either side.  (Looks like the bottom of an "I.")
I folded the fabric to the wrong side 1/4" and again 1/4" and pressed.
Then, I pulled the left side of the shirt directly over the right side of the shirt.
Then I secured the "pleat" with some backstitching.  I also stitched closed the fabric that was pulled to the inside so there wouldn't be a little tube on the inside of the shirt.  I've never done it this way, nor have I ever seen it done this way, but it was easy, and it will be interesting to see how it holds up.  When my little boy wears this shirt he is self-conscious of the shirt being open in the front.  This overlapping at least closes up the front of the shirt.

6.  Then I attached the collar just as I did the wristbands.  I used a button for the closure.  I've also used a tie on one shirt as well as a loop and a button on another.

7.  Hem the bottom.  I folded my hem to the wrong side probably 1/2", then again 1/2", pressed, then straight stitched.

Thursday, February 24, 2011

1840 Girl's Chemise (Slip) Try 2

I took another try at a variation of a girl's chemise last night.  The Workwoman's Guide  (1840) mentions this technique for a lady's shift (chemise) on page 45, so I thought I'd try it for a little girl.

I cut this one out the same as the other chemise according to the child's chemise dimensions.  Well, I did steepen my slope giving me more fabric to work with at the pointy end, but that, in the end makes the back slightly bigger than the front, but still workable (that probably doesn't make sense, but I don't think I'll take the time to figure out how to explain it).

So the body (big trapezoid) is basically 18" on the top and 25" on the bottom and 21" tall.

The shoulder straps are 4" x 11".  The instructions just mention shoulder straps but never say dimensions, so I just made that up.

The sleeves are 4" x 16" with little triangles cut off the ends to mimic the shape of a gusseted sleeve.  See, here I am cutting corners again!


First, I finished the edges of the sleeves as well as the tops of the body (just folded over 1/4" twice and pressed) and straight stitched along the edge.

Then, I folded the shoulder straps in half lengthwise and pressed and attached them to the inside of the body with a straight stitch.  I made sure the folded edge was toward the center -- this makes it so you don't have any edges to finish later!

Next, I marked the centers of my shoulder straps as well as my sleeves, matched them up and stitched them together.

Then, I folded the whole thing in half, matching the side seams and the sleeves and stitched closed.  Typically I finish my seams with a second straight stitch close to the first.  If I remember correctly, that is period appropriate.  You could zig-zag, but they didn't have that back then!  I actually didn't do my second straight stitch on this garment, so I really need to go back and hand overcast my seams together.


Here's the garment right side out.  Obviously it's too wide.  If the arms were bigger, it would fit me!

A technique mentioned in the Workwoman is to run a string through the hem/casing of the neckline.  It doesn't say to do it in these instructions, but I can't imagine NOT doing it.


So, I got my super long needle, some embroidery floss, secured one end on the inside by sewing a 1/2" loop over itself a few times, fed the needle through my little hem to the other side, pulled out the needle, secured the end, then did the same to the other side of the chemise.  You can't really tell in the picture below, but I'm trying to show how I secured the ends of the floss.

It's a little big on her, so I had her hold her arms up for the picture so it wouldn't fall down too low.  I believe the Workwoman said this size should work for age 5 on up; but, my daughter is only 4, well, for a couple days anyway ;-).  It should fit next year.  Had it not been 11:00 last night when I started this project, I would have had her try it on so I'd know how long those shoulder straps should have been!  If I took about an inch off the total length of the strap (4" x 10"), it probably would have been perfect.  I'll probably just sew a 3" piece folded in half along the inside of the front just for modesty's sake and ease of wear this year!

We all think it's really cute!  How am I ever going to get her to wear the first chemise I tried yesterday that fits better?

LinkWithin

Related Posts with Thumbnails