
 |
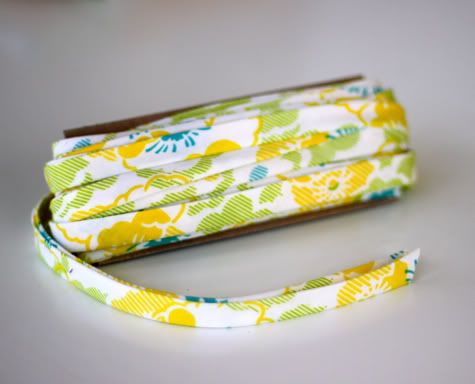
| Image from Prudent Baby |
In my sewing I tend to use a lot of bias tape and piping, particularly to bind a neck. I'm really liking the bias tape roll technique shown on Prudent Baby because I can start with a 10 - 12" square and end up with plenty of bias tape. MADE also shows some additional helpful techniques and gives a review of the Simplicity Bias Tape Maker. I'd love one of those!
To make piping, you cut your bias tape as shown in any of the links above, but rather than folding and ironing it as shown, I just fold mine in half, slide some yarn* in the center and top stitch a row using my zipper foot next to the yarn. For neck bindings I usually use 1" strips, and for bias tape that I'll pipe, I use 1 1/8 - 1 1/4" strips.
I asked Elizabeth Stewart Clark the guidelines on piping mid-century clothing. I really just wanted a few guidelines, but she sent this wonderful information (with a few slight edits from me):
The purpose of piping:
[Piping] acts as a "buffer zone" in high-wear portions of the garment, and also to distribute wearing stress (such as around an armscye [arm-hole]).
How to use/make piping:
It is almost invariably done in the same fabric as the dress, and it is *small*... the pre-made stuff you can buy in packets is more than twice as large as you'll see on most mid-century dresses! I use a single strand of crochet cotton, or very fine kitchen string, or even perle cotton. If you're stitching by hand, it's easy to feel the cording; if working by machine, use a zipper foot to get right next to the cord a bit easier. Though it takes a bit more time to do, hand-basting piping in the armscye does make it easier to sew.
Accurate spots for self-fabric, tiny bias piping include:
1: Armscyes. It's used to distribute wearing stress from the back of the arm, more evenly around the entire armscye, and does help prevent the back of sleeves ripping out with movement. If you have a lot of problems with ripping, though, you need a wider back in your dress as well as piping.
2: Neckline finishes. Very tidy, and it takes up the abrasion nicely.
3: Wrist edges on coat or narrow sleeves; cuff edges on some full-gathered sleeves. Again, this is to absorb abrasion from wear. It's far easier to scrounge scraps and re-do some piping when the wrist edge wears, than to try and re-cut or re-piece an entire lower sleeve.
4: Top and bottom edges of a waistband, or bottom edge only of a waistband. (Ditto as with sleeve edges.)
5: Lower edge of non-waistband bodices, for the same reasons, plus a really nice finish to the bodice.
The place you do not see piping by the 1850s and 1860s include down the front edge of a bodice, in the side seams, in the shoulder seam joining front and back bodice, and in the tuck detail or curved seam in the back bodice.
*According to Liz, I should NOT be using YARN in my mid-century piping, I should be using something smaller! Oops! Something to work on next time! Thanks, Liz! :)
I know I've seen seen some dresses (or an occasional one) with contrast piping, but I guess it wasn't that common in the day. I got my inspiration from modern sources, I guess.
So, this would not be a good example (see the contrast):

Whereas, this would be better (same fabric for the piping), but, still too just a little too large.

Oh well, not many will know that it's wrong, but I'll do better next time!
No comments:
Post a Comment