Showing posts with label Baby. Show all posts

Friday, June 21, 2013

Whitework at the Museum of Church History and Art

I almost forgot to post these pictures.  When we were at the Museum of Church History and Art, I took a few shots of the lovely Smith & Young baby gowns in the Portraits of Childhood exhibit.  Check out this whitework!


Thursday, June 6, 2013

Better Bonnets


I decided it was time to upgrade my girls' bonnets from my fakey-made-up pattern (the free one here) to something more authentic.  Once I realized Liz Clark's slat bonnet pattern was multi-sized I thought I'd give it a go.

I started with the smallest size that said 0-1 and figured that would fit our baby.  However, I found it really is for a little baby (infant), so it was too small for us (plus my kids really do have big heads!).  But, I found a cute baby to try it on!  The Tot size (1-3) would have worked better for my needs.


Next I made one for my 3 year old using the Girl 1 (3-7) size.  She wouldn't try it on or let me take a picture.

Then, it was time to try out the Girl 2 (7-13) size for my 7 year old.  Again, it turned out great, and she even let me take pictures.


For the curtain I used this awesome rolled hem stitch that I learned from Liz at her day cap class.  It is now my favorite hand-stitching technique.  Obviously, it works great when you need a small hem, but it works wonders on curves.  Basically you work using a very small fold on the edge of the fabric stitching at the top of the fold then right below the fold (like a zig zag).  When you get several stitches in a row, you pull your thread and your hem rolls up nice and tidy.  I'm in love.


Somewhere between making bonnets, I got on Pinterest and found a bonnet that Sarah Jane at Romantic History had made that I wanted to try.  It wasn't until later I saw she had a tutorial!  That project will be my next post!!  So excited!

One reason I wanted to try her bonnet was she gave a nice little primer on types of bonnets.  

Corded bonnet (I've never made one):
  • visually attractive
  • very stiff when starched (but collapses in the rain, or wilts in humidity)
  • needs quite a bit of cording to hold up
Slat bonnet:
  • holds up well in weather (since I used thick paper in mine, I'm not sure how well that would do in the rain; ahem, I guess all the reason to cheat and just use heavy interfacing)
  • cannot be folded back to increase your view (this is what really inspired me to make a quilted bonnet.  If my kids can see better out of their bonnets, they're more likely to keep them on.)
Quilted bonnet:
  • attractive
  • stiff brim without starch
  • can be folded back
  • warmer than slat and corded bonnets


Tuesday, May 14, 2013

Loving the Horseshoe Cap!


Recently I posted a pattern for the Horseshoe Cap from The Workwoman's Guide, 1840, along with a trial run.  Well, I've finished my real version!  I made it with lawn and hand stitched the entire thing, if you can believe it!  It took around 5? hours?  I think it's really cute.  The weird thing is, she keeps it on??  I was able to use one of the new sewing techniques I learned from Liz Clark's day cap class and loved it.


On the ruffle on the back, I used a piece of fabric just the width of the cap as I knew I'd be drawing it in.  I didn't want it ending up really bunchy back there.  For the front ruffle, I used a strip twice as long as the front length and gathered it down.  I noticed in period pictures from the Wisconsin Historical Society, that the neck tie looked like twill tape.  I only had really wide twill tape, so I just made some ties with my lawn.


I'll have to remember to pull it just a little tighter around her head.

Wednesday, May 8, 2013

Infant's Horseshoe Cap


I had even more fun today trying out the Child's Horse-Shoe Cap from The Workwoman's Guide on page 21.  I've changed the name here to Infant's Horseshoe Cap because the size is more for a baby, rather than a child.  Again, I've used contrasting thread so it's easy to see my stitching.


1.  Cut out your pieces.  It's easiest with a pattern.  I tried drawing a pattern on line, but it just didn't work as well as I would have liked, so I drew one up and scanned it.  The only problem is that no matter what I do, it prints about 3/8" too small. So, when you cut, just make everything 3/8" bigger!  I've marked how big everything should be, so you can compare how yours prints out to a ruler.  Luckily, though, it doesn't have to be exactly perfect (you can see my curves aren't even exactly like the Plate, but it still turns out cute).


2.  Add your runners (small casings for string to run trough to be tied and adjusted), "The cap is made up with two or three runners in front."  Hem the front edge.  (Don't you love that my iron leaked rusty water on my fabric?  So glad I was just testing in muslin!)


3.  Gather the back, mark the center.


4.  Sew the back and the brim right sides together, matching centers.


5.  Hem the bottom.  Allow for a string to be run through.  Add a 1" ruffle all the way around ("the frilling is one inch deep").


From the side:


The first size is little!  Maybe 0-3 months?


Here is my 14-month old in the second size.  Once I add the 1" ruffle and a neck tie I think it will be just right.  I only ran the string through the back bottom, but will along the top front runners, too, in the final product.


The difference between the first and second sizes:


Poor Infant's Cap: Easy Make, Easy Wash


I've been wanting to make a new cap for the baby out of better fabric (lawn instead of muslin).  I even learned some new hand-sewing techniques at Liz Clark's day cap class that I've been wanting to try out.      So, I went to the Workwoman's Guide and found this Poor Infant's Cap.  Actually, I gave it that name; it doesn't even have a name in the book.  It was really easy, but it is REALLY small---probably for a teeny-tiny baby!  So, I'm really glad I did a muslin test run first because it definitely won't fit my 14-month old.  As a larger size was not given, I'm not sure that this kind of cap would be used for an older baby.

In my test-run, I used contrasting thread so you can see where I ran my stitches.  Here's how I did it, with both the original instructions and my interpretation.

Original: PLATE 2 FIG 12 13 This is much used by the poor, and is easily made and as easily washed. 

Original: Take of the material a piece 6 nails down the selvage and 3 1/2 nails wide. 
Translation: Cut a piece along the selvage 13.5" by about 8" (my picture does not follow the selvage; it should be cut the other direction).


Original:
Double it, letting D be the doubled part.
Translation: Fold it in half.

Original: Sew up the back from A to C leaving a small hole or button-hole at the top C;
Translation: With right sides together and your fold at the top, stich down one side to form the back of the cap leaving a small gap at the very top (next to the fold) and another small gap half way down.  

Original: make a runner all round the front and behind, at half a nail's distance from the edge, which is hemmed with a very narrow hem to form a frill; also lay in a runner from E to F;
Translation: About 1" in from the edge on the right side of the fabric, sew a small casing along the bottom and front edges of the cap. Sew another casing along the front edge of the cap about about 1 1/4" in from the first casing, stopping a little over an inch above the bottom edge of the cap on either side. Sew a narrow hem along the front and bottom edges of the cap to form a frill. (The frill is very minor. If you cinch up your strings to make more frill, the cap is even tinier!)


Using a blunt needle, run 6 strings through your casings securing one end (see top drawing and below picture for placement). If you are hand sewing, I'd just hand sew my strings into my casings as I go.

Original: next, sew a bobbin at B, letting one end of the string hang outside and the other being pulled through the seam, remains inside the cap. This end is carried up and brought out through the hole at C (see the dotted line in the Plate which represents the top inside); when worn, the tapes, on being tied together at B, draw up the cap into shape, and if neatly arranged and pulled out with the fingers, it looks very neat and pretty. (See Fig 13) Some put a loop of bobbin inside at B, which on being brought out through C, fastens to a button at B, on the outside.
Translation: Run a tape (I used a ribbon) through the little holes you left in the back of the cap. Secure one end at the back center; pull the other end to tighten up the back. Tie the ties together to keep the shape. You can also put a button on the outside of the cap where you can secure your long tie. For ease, I just left two long ties and tied a bow.

Add chin ties.


Sunday, April 1, 2012

106,000 hits!

A bit back I checked the stats here in blogger and was in the 90,000 range for number of hits on this blog.  I was quite stunned.  I remember when I started it, I was nervous to click create blog for fear of what people would think -- this was my first public blog.  I checked today and I had over 106,000 hits!!

I knew I needed information like what's on this blog, but I didn't realize there were so many others out there who would want it, too!  I've seen some of you make bonnets for your girls or dolls, some of you make them for yourselves/others to garden in (smart idea!), and many of you link for trek purposes!  I'm just glad it's been helpful.  And, I think everyone who has used my pictures/instructions, has given me the credit, so thanks.  I always try and do the same.

Maybe I should celebrate by hosting a giveaway or something?  My husband thinks I should put up ads and make some money.  Hmm.


I haven't posted for a while because I haven't had any projects lately considering I'm not doing TITP this year because we have a new little one the family.  Not only do I not want to mess up her napping, I really don't want to nurse around soo many people, many of whom want to be talking to me, and sometimes all at the same time!  Sometimes things just don't slow down. 

Speaking of nursing, I learned something cool about nursing from The Gift of Giving Life back in the day:

Bet you can't readily spot the nursing moms, can you?  But, I don't want to be nursing authentically up at TITP.  You can thank me later.  (I really don't mind nursing in public -- covered; nor do I even mind other women nursing openly -- just not me!)

More info about nursing in public.

Sunday, March 27, 2011

18-month Baby Dress

I ordered Liz Clark's Infant Gowns patten recently and have been having too much fun.  You know me, I can't just make one of something, I have to try everything!  The inspiration for the first came from Earthly Angels:

I should have made the waistband a little narrower, and it's still a little long, and we could wear a few petticoats underneath, but I'm really pleased!  Maybe it was just the cute little girl that drew me toward this one, maybe it was the dress.

She actually stood still for the picture!

Yes, those are wooden buttons, which were probably not too common on little girls' dresses, but I just have so many wooden buttons and I need to use them up!  Metal buttons, hooks & eyes, or fabric covered buttons would have been a better option.

Wednesday, March 16, 2011

Toddler Pinafore

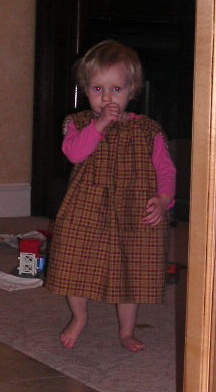
Baby needed a new pinafore this year. I used Elizabeth Stewart Clark's FREE 1-2-3 Pinafore insturctions.  I used a full strip of 45" fabric.  I was so good to line up my plaid at the side seams, then forgot to on the pockets!!  Now that's going to bug me since I could have actually done a very good job.

Baby was asleep when I needed to measure the neckline, so I guessed WAY too big.  Rather than taking the neckline all out, I fixed it by using a long needle with a large eye (my needle isn't very blunt, but a blunt needle would be good), secured a string at one end of the neck binding (on the inside) by making a few loops over each other, ran the string through the neck binding, pulled a little to scrunch the fabric (like gathering), and secured at the other end with a few more loops to tighten it up.

This project took around 2 hours.
Baby with the way to big neckline!
She won't stand still for a picture.  Got a good back shot of her running away!
Caught her off guard when she turned around!

Thursday, February 17, 2011

Tiny Underclothes

I had so much fun today making a little undershirt/chemise and drawers for the baby; well, she's not so much a baby anymore, more of a tiny toddler.

Amy over at A Day in 1862 had posted a few patterns (multi-sized!) that I've wanted to try out for a while.


She saw these little drawers and came up with her own FREE pattern.


It worked very nicely.  I noticed that the shape of Amy's pattern is basically the same as that in the 1840 Workwoman's Guide!

Plate 7 Figures 3 & 4. 

Amy saw this little 1850-59 undershirt/chemise on the Wisconsin Historical Society's Online Children's Collection.
And again, came up with a lovely little pattern.

  
Big thanks to Amy for sharing her patterns!

I haven't put growth tucks in the legs yet.  I'll wait and see how tall baby gets in a few months to see if I need to.  She's so skinny I may need to run a string through the drawer waistband to tighten them up a bit (or move my button, see below).  Hopefully she'll grow though, and they'll fit just right this summer.

The neck on the chemise is pretty big.  I made a few gathers in both front and back, but could have pulled it in a bit more.  I did not create an opening in the neck because it is so big; so it's just a pull over.  I tried baby's dress on over the underclothing and the chemise does not peek out.  If it does slide too much, though, I can, again, run a string through the neck binding to tighten it up.

I did a button with a loop on the drawers for the closure.  I'm still working at getting the placket right.   Need more practice!  If you've seen a good tutorial online for this, send me a link! :)

LinkWithin

Related Posts with Thumbnails