Showing posts with label Boys. Show all posts

Sunday, March 3, 2019

The Workwoman's Guide: Shirts for the Laboring Class page 137

Does anyone even read blogs anymore? I really haven't read them in years, but I've also moved to a new city and had another child and now have five kids from age 15 down to 3, so maybe the lack of reading blogs is just me? I also haven't done any Pioneer sewing since trek, except for some aprons to use up some scraps and to teach my 9-year old how to sew a little. Anyway, now dear little son
has become a dear big son 
and needs clothes for trek this summer. He will be such a good age to go: almost 16 and strong! He's not the biggest kid but he will be an asset to his "family." Just when we thought we were out of the woods for going on trek, too, this time around, we got asked. Luckily we can just use our old clothes, provided we haven't gotten too fat. I would still love to make me a corset/stay and a new dress, but time won't permit.

I asked Eli (son) if he would like to go on trek more authentically or like the other kids. He said he would like an authentic shirt but maybe not pants. He said he'd even wear a vest, but I don't know if they'll require it, so I might not make one. My husband's didn't turn out perfectly last time, so I do want to redeem myself there with another attempt. 

I've wanted to figure out the Workwoman's Guide Laboring Class Shirt page 137 so I gave it a go. I was very confused with some of the directions but found this lovely post by Andrew which helped a lot. Andrew's work is just beautiful! I was mostly confused with the neck gussets and how to gather them. This adding fabric to make curves is just so weird compared to just cutting fabric away like we do now.

Despite my best efforts, when Eli tried the shirt on the first time, the neck and wristbands were both about an inch too tight! What?! I'd used the size for ages 15-18, and since he's a smaller 15-year old, I thought that size would be just right. It said the collar was 15.75", and his Sunday shirt is a 15.5", so I should have worked, right? Maybe my seams were too big? I took off the collar and the one wristband that was sewn on and cut bigger ones. He tried it on again just the other day and this:


The arms are way too short! The Workwoman suggested to even add a couple inches to the fabric, which I did. I need between 2 and 4 more inches!


Oh! And when I put in the arms, the armscye was just not deep enough! Look at how it scrunches up in his armpit! I had to take out both arms, release my gathers and insert the arms again deeper. What a nuisance. The second time, I made sure the gusset went down to the bottom of the lining, not the 9" down as suggested in the instructions.

His Sunday shirt is behind and it's significantly bigger; it is a little big on him though.


I was also disappointed with the gathers in the back. Having no great example to go by, I wasn't sure how to spread them, and I don't love it. Eli also said that the shirt feels like it's pulling his harms back which isn't good. It might be a little reflection on his posture, though.


Anyhow, I made a conversion chart with "translated" modern measurements for the shirt pieces:


And for future reference, here's a visual of where the measurements go:

And here's kind of a key for the Workwoman's abbreviations:

There's so much info out there now, that I won't go into all the little details about construction anymore. In fact, I was looking in Liz Clark's stuff tonight and saw some great links. 

I might make the next size up next, or make the same size with longer arms, or just try the pattern I used for my husband which I know works. I guess I could also take out the sleeves of this shirt again, make them longer, then re-attach. I could take off the collar, re-gather so the shoulders feel better, then re-attach again, too. On the next one I'll try to make a more closed front since we are not used to open shirts like these were. I wish this had worked better, but you never know unless you try.


Tuesday, September 24, 2013

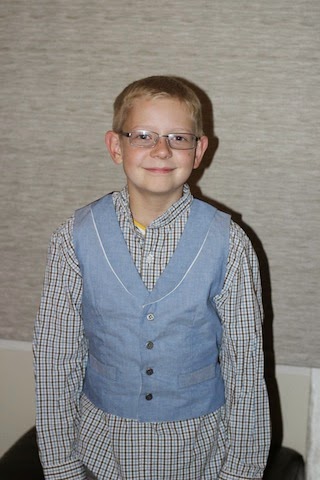
McCalls 4290 Vest

I really haven't disappeared, but during the summer I made this vest for my boy's friends so they could come volunteering with us.  My son really wanted to keep it for himself . . . next year, I suppose.  Isn't he a cute kid??


Monday, March 28, 2011

Man's/Boy's Shirt Tutorial (Simplified)

I found a Pioneer Man's Workshirt on line several years ago from The Mountain Man's Sketch Book and have made it in different sizes over the years.  I don't really need this size yet, but thought I'd make it so I could create a man's (or boy's) shirt tutorial.  I don't know if The Mountain Man's Sketch Book is a credible source. I haven't done my research.

From the get-go, you should know:

  • I found in trying it on myself that if I button it, it is rather choking!  If I unbutton it, and let the shirt fall to to the back, it fits more comfortably.  I'm surprised my little boy has never complained of the neck!  Maybe, though, the shirts he has worn were big enough on him that he didn't notice the ill fit.
  • I found this version of the pattern that seems to have more instructions and more of a neck cutting guide -- so it might be better than the version I used.  I'd like to try something from The Workwoman's Guide also, but thought I'd stick with something I was familiar with for now.  Perhaps I'll actually buy a pattern some day, but this will suffice for now.
  • The original pattern calls for a facing for the neck opening.  I've made it that way in the past, as well as tried some other methods, but this time I totally cheated -- you'll see. I didn't even use a facing.
  • You're also supposed to cut a slit in the sleeve for the wrist opening, but again I cheated for simplicity's sake and just left the arm seam open a few inches near the wrist.

The dimensions for this pattern at full size are on the downloads, but if you want to reduce the size, here are the dimensions:

75% (this is the size that almost fits me -- I'm about 5'4")         
Body          22.5" x 49", with the center 17" being reserved for attaching the sleeve (leaves 16" at either end)
Neck          7.5" wide maximum x 3" high maximum*
Neck slit    7.5" deep from the bottom of the neck curve
Sleeve        18" high x 20.5" wide -- the 20.5" is the part you gather)
Sleeve slit  5.25" in from the right edge of the sleeve when laid flat, cut 3.75" deep
Collar        17" x 3"*
Cuff           8.5" x 3"*
Facing

65% (boys' 7/8)   
Body          20" x 42", with the center 15" being reserved for attaching the sleeve (leaves 14" at either end)
Neck          6.5" wide maximum x 3" high maximum*
Neck slit    6.5" deep from the bottom of the neck curve
Sleeve        15.5" high x 18" wide -- the 18" is the part you gather
Sleeve slit  4.5" in from the right edge of the sleeve when laid flat, cut 3.25" deep
Collar        15" x 2.5"*
Cuff           7.5" x 2.5"*
Facing       3.25" x 8.25", with a slit cut 6.5" deep from the top

55% (5T)
Body          16.5" x 36", with the center 12.5" being reserved for attaching the sleeve (leaves approximately 12" at either end)
Neck          5.5" wide maximum x 2.5" high maximum*
Neck slit    5.5" deep from the bottom of the neck curve
Sleeve        13" high x 15" wide -- the 15" is the part you gather
Sleeve slit  4" in from the right edge of the sleeve when laid flat, cut 3" deep
Collar        12" x 2"*
Cuff           6" x 2"*
Facing       3" x 7", with a slit cut 5.5" deep from the top


* I'm sure you could keep your collar and cuffs bigger (keep the width the same, but increase the depth so that you have a bigger collar or cuff).  You could also leave your neck hole bigger, rather than reducing it.  Kids' heads are still really big in proportion to their bodies!


Here's how I did it:

1.  Cut or tear the fabric out according to the desired size.  Next time, I may try shifting my neck hole a couple inches to the front to see if that helps alleviate the choking neck line.  Any other suggestions?

2.  Run two gathering stitches (long straight stitches) along the edge of the sleeve (at 1/2" & 1/4").  Gather the sleeves down to fit the appropriate area on the shirt body (according to the pattern dimensions).  Attach the sleeve to the body, right sides together, with a straight stitch 1/2" from the edge of the fabric.  You can zig-zag the edge, or to be a little more authentic, just stitch a second straight stitch 1/8" again closer to the edge. 


3.  Fold the shirt in half and sew your side and underarm seams. I did not sew completely to the wrist, but stopped a few inches short to leave an opening in the seam for a wrist opening (I didn't want to have to bind wrist openings).  Again, you may also zig-zag your seam, or do a second row of straight stitching. 
Here are the few inches I left open in the seam:
I folded the raw edges under 1/4" and again 1/4" and pressed and stitched around the opening:
From the inside:

4.  Run two gathering stitches along the edge of the sleeve.  Pull threads to gather the edge of the sleeve down to fit just inside the wrist band (leave 1/4-1/2" of the wristband sticking out on either side of the gathered sleeve.).

Stitch at 1/2".

Press the wristband away from the sleeve.  Press the short side edges toward the wrong side and then press the long edge also toward the wrong side.
Fold the wristband in half and carefully press and pin.
Stitch along one short side of the wristband, along the long, open side, then along the other short side to close. 
 I made a loop with a button for the closure.
  Repeat on the other sleeve.

5.  Now it's time to finish the neck.  Instead of cutting a facing for the head/neck opening, I just cut away horizontally from the bottom of my vertical slice about 1/2" to either side.  (Looks like the bottom of an "I.")
I folded the fabric to the wrong side 1/4" and again 1/4" and pressed.
Then, I pulled the left side of the shirt directly over the right side of the shirt.
Then I secured the "pleat" with some backstitching.  I also stitched closed the fabric that was pulled to the inside so there wouldn't be a little tube on the inside of the shirt.  I've never done it this way, nor have I ever seen it done this way, but it was easy, and it will be interesting to see how it holds up.  When my little boy wears this shirt he is self-conscious of the shirt being open in the front.  This overlapping at least closes up the front of the shirt.

6.  Then I attached the collar just as I did the wristbands.  I used a button for the closure.  I've also used a tie on one shirt as well as a loop and a button on another.

7.  Hem the bottom.  I folded my hem to the wrong side probably 1/2", then again 1/2", pressed, then straight stitched.

Thursday, March 17, 2011

How should I fix my little girls' hair?

Well, from what I can tell, it's actually easier than you think!  I've always tried little braids and pigtails for my daughter, but since we're not endowed with much hair in this family, it doesn't work so well.

I believe it was in one of Liz Clark's many documents on dressing children that she mentioned just parting the hair down the middle and slicking it down, cut short.

I was looking through Earthly Angels for some new toddler dress ideas and noticed so many of the girls wear their hair this way.

An example from the site:

Now wait a second...  is that three little girls or two little girls and a boy on the left?  Well, I'm beginning to notice that all the little girls' hair is parted in the center (or no part at all -- just combed back); whereas, the little boys' hair is parted on the side, even though they may be in dresses!  The little boys in dresses just signifies that they are not yet potty-trained!  Getting pants must have been a rite of passage!

Friday, June 11, 2010

Zipper to Button Fly


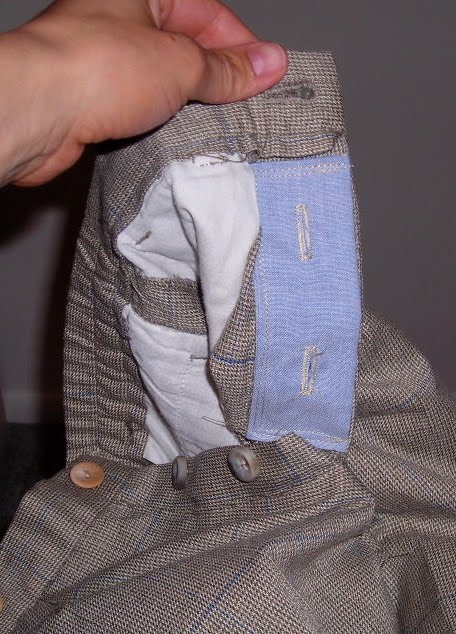
I got these pants at the DI for my son for $2-3. I removed the belt loops and added buttons for his poor boy suspenders. I know the pants have pleats, which Pioneer men didn't have, but I really didn't feel like trying to fix that.

I realized the zipper was broken, so I decided to add a button fly. And, yes, I know those buttons are plastic inside, but I figured no one would be looking!

Saturday, May 1, 2010

"Poor Boy Suspenders" Tutorial


After reading up a bit on "Poor Boy Suspenders," I thought I'd give it a try.

I used some cotton broadcloth (if you want to be more accurate, though, Liz Clark mentions in her book, The Dressmaker's Guide, that historic broadcloth was most likely wool).

How I did it:

1. I measured my little boy to see how long I wanted the suspenders to be. The finished length needed to be 31". I wanted the finished width to be 1.5".

2. So, I cut two pieces 32" x 6".

3. I always like to use my iron to mark lines in my fabric, so I folded my fabric in half lengthwise, pressed it; folded my short ends in about 1/2", pressed them; then, folded each long half down to the mid-mark, pressed them; then lastly, folded it in half lengthwise and pressed. (I could have made my whole piece 32" x 2 1/2", but I wanted to bulk up my fabric.)


4. Then I top-stitched the three open sides (two short sides and the one long side). (One source said top stitching was done on just 3 sides of the fabric.)

5. Then I put two button-holes on each front and one button-hole on each back (yes, I know I used my machine!!).

I'm going to see how well they stay on my son (uh, once he gets some pants). If they slip, I may attach the two back pieces, or make a "slider" on the inside as one of the sources mentioned.

These were super easy and took about 30 minutes.

Saturday, April 17, 2010

Poor Boy Suspenders

Never in a million years would I have imagined that I'd be researching re-enactment suspenders! I read through 4 main pages (at the bottom) and here's a summary of what suspenders/braces can be.

My apologies for not documenting which detail came from which site!

Can be made of:
  • cotton shirting
  • linen
  • cotton blue jean
  • cotton jean
  • stout cotton
  • tapestry
  • velvet
  • woolen carpet
  • sail cloth
  • cotton webbing
  • canteen cotton webbing
  • twill tape
  • cotton tick ("heavy, sturdy fabric with a close, even weave" http://www.wisegeek.com/what-is-ticking.htm)
  • leather
  • braided leather
Potential fabric looks:
  • brown/tan checkered
  • red striped ticking
  • plain
  • print
  • embroidered
Dimensions:
  • 1-2" width (specifically mentioned 1 3/8" or 1 1/2")
  • 52" long
Sewing:
  • hand sewn 7 stitches to the inch
Thread:
  • brown/blue linen thread on the cotton jean
Assembly:
  • 2 separate straps crossed over in back either right over left or left over right
  • Can be stitched together in back to form an "X"
  • 1 - 2 buttonholes in the front and the back (to allow for adjustments)
  • Rather than permanently stitching back together, can take a 6-8" long piece of fabric/webbing/tape and stitch either end of it on the inside of one of the straps about 4 - 5" above the back buttonhole. Then, slip the 2nd trap through that to hold he back together.
Buckles on suspenders came after the Civil War. The "X" was worn during the Civil War, while the "Y" back came probably in the 1870s.

http://www.authentic-campaigner.com/forum/showthread.php?1757-Poor-boy-suspenders

http://www.cwreenactors.com/forum/showthread.php?t=7761&page=2

These two articles actually have references!!
http://www.authentic-campaigner.com/forum/showthread.php?8278-Did-You-Know-They-Wore-Braces-in-the-1860-s-!-by-Aaron-Young

http://www.authentic-campaigner.com/forum/showthread.php?8272-Visible-Means-of-Support-by-Chris-Sullivan&highlight=suspenders

Thursday, March 4, 2010

They really did dress little boys like little girls!


I just had to share this picture from my mom's blog. This is my Swedish grandpa in probably 1915 -- 95 years ago! I know it's not Pioneer, but even in 1915, they still dressed little boys the same as little girls. I LOVE the shoes!

Sunday, February 7, 2010

Goldmine!


I was reading over Elizabeth Stewart Clark's guide on dressing infants, and in it, she refers to The Workwoman's Guide. I Googled that and found it in Google Books! So awesome! Page 16 talks about babies!

The book was first published in 1838, and then again in 1840, which is a little before the time period I need, but it's pretty close (Mormon Pioneers were first in the SL valley in 1847). I'll just have to pretend that some of our clothing is hand-me-downs from older children.

I saw a post somewhere else that listed some other related Google Books -- I'll have to check these out . . . someday.
Health Husbandry and Handicraft
The Sampler: A System of Teaching Plain Needlework in Schools
The Boys Own Toymaker
The Girls Own Toymaker
The Girls Own Book
Etiquette for all
Etiquette, Social Ethics and the Courtesies of Society
Hints on Etiquette....
The Hand Book of Etiquette
The Lady's Companion
The Laws of Etiquette...
How to Do It (covers needlework to carving to water cure)
Forty years of American Life (3 versions)

Wednesday, November 18, 2009

Vests


I found the men's vest at the DI and cut off the points and folded the seam up into the vest using suggestions found in converting clothing. Easy. I left the buttons because they look wooden-ish & I wanted to save a little money. The fabric is too shiny, and I've been told that in Pioneer days the back of the vest was out of the same material as the front of the vest -- not like the vests today.


I made these boys' vests using a modified pattern (McCalls 4290) with shell and wooden buttons.

Mens and Boys Shirts


My husband doesn't share my love of Pioneer clothing, but he needed some for the Pioneer Day parade, so you can guess I made him a whole outfit for his birthday! (Just what he wanted!!) I found this men's shirt at the DI, cut off the collar and pocket, and replaced the plastic buttons with metal based on suggestions on converting clothing.


I got this shirt for my son from a neighbor who was getting rid of it. Again, I cut off the collar and pocket and replaced the plastic buttons with shell.

Monday, November 2, 2009

How to Dress Like a Pioneer

The most extensive and seemingly most up-to-date on-line information I've found is by Elizabeth Stewart Clark (I only say seemingly because I haven't done any research on my own, so I can't verify it ;-)). In fact, you probably found this blog only because it was so easily Googlealbe. Liz's info is mainly in PDF format, so it's a bit harder to search.

As she's a dressmaking instructor and historic pattern designer, she's done some great research. If you visit her Sewing Academy Compendium, you can find information on how to dress like a Pioneer in warm and cold weather:

  • Babies
  • Girls - For an example of what I've made with her patterns, click here or here.
  • Boys
  • Teens
  • Women - For an example of what I've made with her patterns, click here or here.
She has more information specifically regarding treks on Mormontrek.net for:

  • Men
  • Women
  • Girls
Both of Liz's links above have additional information that you may find very useful, regarding choosing patterns, clothing fit, and MUCH, MUCH MORE.

The patterns/companies listed on my patterns for purchase link also seem to be historically accurate, but then you have to buy the pattern to see what they have to say!

Additionally, The Workwoman's Guide, which I found on Google books, is a book published in 1840 by "A Lady." It is pretty hard for me to understand a lot of the sewing terminology, but it gives patterns for how to make tons of stuff.

Westville has some quick guidelines on dress for both men and women.

Costume of the California Goldrush seems to have some good stuff, too.

Boys' Clothing


I made this boys' shirt with a free frontier work shirt pattern I found on line.

Add a vest with wooden buttons (warning: these wear out easily), corduroy pants, leather shoes, and a cap for a complete look!

(The top shirt was actually too small, so I made a bigger one shown in the bottom picture.)

LinkWithin

Related Posts with Thumbnails