Showing posts with label Shirts. Show all posts

Thursday, April 25, 2019

For the Men

So I mentioned I'd made the Workwoman Guide's Men's Shirt for the laboring class for my son and had all sorts of problems. I chatted with Liz Clark and she suggested dropping the front neckline a little to see if it would improve the fit for my son's slightly slouched posture. So, I again took off my neckband, cut down an inch and curved it back to the shoulders, re-attached the neck band and voila, we now have a shirt that fits. I now can say I would recommend the Workwoman's guide free men's shirt pattern, with the slight adjustment in the neckline.


Before I did that nifty trick, I decided to just try using instructions that Liz had linked to at Tea in a Teacup on a second shirt to see if that would solve my problem. The style there is slightly earlier, so the measurements are a tad different. So, I used more the measurements in the Workwoman's Guide, but followed the construction directions at Tea in a Teacup. The instructions were definitely helpful, especially for making nicer neck gussets. The whole shirt just seemed to come together better, but I still had that slouchy-shoulder-weird-neck fit, but once I cut down my neckline, the problem was solved. Our modern posture is just too bad to fit these proper-cut shirts, but maybe they were just weird fitting then, too?


I had wanted to do one of the gentleman's pleated fronts from the Workwoman's Guide, but because the instructions were not enough for me, I gave up on that idea and just made my son another laboring class shirt with my leftover sateen from my husband's shirts. I also thought I had the pattern I had used for my husband, but realized I'd borrowed it. I couldn't figure out the construction without taking my husband's shirts apart, and I'm not willing to do that, so that was another reason to not do pleats.

I think I'll go back and fix my husband's old shirt, too, so it will fit better.

For my son's pants, we took a little trip to the DI to see what we could find since I didn't want to take the time to make pants completely from scratch. After some picking through, we came across some cotton-linen pants and some cotton pants, both Banana Republic. He's got a 28/29" waist and 32" inseam, so it's really hard to find things that fit him, and both of these were bigger in the waist. I figured I could do some alterations to make it work. We did find one 29"/32" in synthetic fabric, but I don't know how comfortable those will be on the long haul and in the heat. We bought them anyway for $6 in case my alterations didn't work out.

The original waists:


My Laughing Moon pants pattern that I've never used has a notch in the back waistband and a "belt." So by cutting off the length in the hem of the pants, I was able to make the belt. I hacked a "V" notch.


Oh my, some silly person had stapled their pants. Luckily I fixed that.


For the cotton/linen pants I just took in the waist in between the side seam and the pocket. I'm not sure if it's enough, but the pants do have a draw string I can pull in and stitch down.


Because pants are so tight these days, my son wondered about the leg width. I cut out his size from the pattern and found that the width of these DI pants is actually pretty close to the real deal. You can see he has the short legs like me.


I'm taking these trek projects one step at a time. If I get time, I'll add buttons for suspenders (I'll just have to remember to buy the suspenders!) I'd love to make him a vest, too (not required for trek, so he probably won't even wear it) and a cravat (I even have some silk I can play with) to complete the ensemble.


Sunday, March 3, 2019

The Workwoman's Guide: Shirts for the Laboring Class page 137

Does anyone even read blogs anymore? I really haven't read them in years, but I've also moved to a new city and had another child and now have five kids from age 15 down to 3, so maybe the lack of reading blogs is just me? I also haven't done any Pioneer sewing since trek, except for some aprons to use up some scraps and to teach my 9-year old how to sew a little. Anyway, now dear little son
has become a dear big son 
and needs clothes for trek this summer. He will be such a good age to go: almost 16 and strong! He's not the biggest kid but he will be an asset to his "family." Just when we thought we were out of the woods for going on trek, too, this time around, we got asked. Luckily we can just use our old clothes, provided we haven't gotten too fat. I would still love to make me a corset/stay and a new dress, but time won't permit.

I asked Eli (son) if he would like to go on trek more authentically or like the other kids. He said he would like an authentic shirt but maybe not pants. He said he'd even wear a vest, but I don't know if they'll require it, so I might not make one. My husband's didn't turn out perfectly last time, so I do want to redeem myself there with another attempt. 

I've wanted to figure out the Workwoman's Guide Laboring Class Shirt page 137 so I gave it a go. I was very confused with some of the directions but found this lovely post by Andrew which helped a lot. Andrew's work is just beautiful! I was mostly confused with the neck gussets and how to gather them. This adding fabric to make curves is just so weird compared to just cutting fabric away like we do now.

Despite my best efforts, when Eli tried the shirt on the first time, the neck and wristbands were both about an inch too tight! What?! I'd used the size for ages 15-18, and since he's a smaller 15-year old, I thought that size would be just right. It said the collar was 15.75", and his Sunday shirt is a 15.5", so I should have worked, right? Maybe my seams were too big? I took off the collar and the one wristband that was sewn on and cut bigger ones. He tried it on again just the other day and this:


The arms are way too short! The Workwoman suggested to even add a couple inches to the fabric, which I did. I need between 2 and 4 more inches!


Oh! And when I put in the arms, the armscye was just not deep enough! Look at how it scrunches up in his armpit! I had to take out both arms, release my gathers and insert the arms again deeper. What a nuisance. The second time, I made sure the gusset went down to the bottom of the lining, not the 9" down as suggested in the instructions.

His Sunday shirt is behind and it's significantly bigger; it is a little big on him though.


I was also disappointed with the gathers in the back. Having no great example to go by, I wasn't sure how to spread them, and I don't love it. Eli also said that the shirt feels like it's pulling his harms back which isn't good. It might be a little reflection on his posture, though.


Anyhow, I made a conversion chart with "translated" modern measurements for the shirt pieces:


And for future reference, here's a visual of where the measurements go:

And here's kind of a key for the Workwoman's abbreviations:

There's so much info out there now, that I won't go into all the little details about construction anymore. In fact, I was looking in Liz Clark's stuff tonight and saw some great links. 

I might make the next size up next, or make the same size with longer arms, or just try the pattern I used for my husband which I know works. I guess I could also take out the sleeves of this shirt again, make them longer, then re-attach. I could take off the collar, re-gather so the shoulders feel better, then re-attach again, too. On the next one I'll try to make a more closed front since we are not used to open shirts like these were. I wish this had worked better, but you never know unless you try.


Thursday, April 3, 2014

Past Patterns 007 Men's Shirt, View A


Today I FINALLY finished my Past Patterns 007 Men's Shirt, View A.  I'm telling you, this shirt took as long as a making a dress, but I'm really pleased and definitely like it better than View B!  I did parts of it by hand (more than normal), and parts by machine.  With all the effort it took, I'm not sure I want my husband to actually wear it on trek!  I can't wait to make the cravat, but I'm still trying to figure out exactly how to do that.


I'm not sure if I did the detachable collar correctly, but it seems to work.


I did both of my gussets correctly this time.

Hand stitching on the inside (did not line).

My next project is to recreate the man's shirt from The Workwoman's Guide!

Tuesday, November 5, 2013

Past Patterns 007/011 View B Men's Shirt

I just (nearly) finished the Past Patterns 007 View B Men's Shirt in size 40. Fairly recently Saundra Ros Altman, the designer, has split out the two shirts originally in 007, added some larger sizing and is now selling the two shirts separately as patterns  010 & 011.  Under the new packaging, this view B is 011 (1840-1870).  I did shorten the shirt a bit.

Made up, it looks good on the hanger, but lays kinda funny on my husband, but that may be due to his posture?

I used a cotton sateen so it is very soft.  I incorrectly machine stitched everything, even more than I normally do, because I didn't want to spend the time hand sewing.  However, I guess to make up for it, I did the gussets by hand (guess there's no other way to do those than by hand anyway), and I even did all 5 of my buttonholes, which is a first for me!  I did a few practice buttonholes, got a few tips from Liz Clark on how to do them better, and I think they turned out okay!  I think I gained some confidence in doing them when Liz said you need to do about 100 to get them right.  I did tons of hand sewing/embroidery when I was a kid, so I figured that had to count for something, and I think it really helped.

I'm really excited to try View A because it's more like the shirts in The Workwoman's Guide which I hope to also figure out later and put up as a tutorial.  But first, I need to make a Christmas stocking for the baby (she didn't even get one last year!) and make a baptism dress for our daughter.  After that, I think I'll hit men's shirts again.

See how the pleats don't lay flat up by his collarbones? Does it need to be bigger?

Hand sewn buttonholes.  Not too shabby.  I ordered some shell buttons on E-Bay and was really excited about them.  Originally I thought wood was the way to go being a natural product, but no, shell and China are authentic.

Gussets.  Actually, I put the other one in backwards, but I think I'll leave it incorrect. You know, make it like those Amish quilts with a mistake?  It won't be too hard to fix if it starts to bug me.

And yes, the biggest mistake.  Because I shortened the shirt, somehow I did not shorten the front and back to the same length! So instead of buying new fabric, I just pieced.

Sunday, June 23, 2013

Men's Shirts & Waistcoats

Someone posted this page of shirts from the Ward Shirt & Collar Mfg company in the 1860s on Facebook the other day.  I wanted to find a better copy to save, but couldn't.


However, in the process of looking, I found this Irish-made shirt at the Australian Dress Register from the 1840s that is quite similar.


The Australian site also has some waistcoats (vests) from the 1830s-1860s.  Recently on the Civilian Civil War Closet Facebook page, someone asked what types of fabric to make vests out of.  The answer there was light/medium weight linen/cotton/wool; cotton velveteen; or silk jacquard (plain or patterned).

Sunday, July 1, 2012

Monday, March 28, 2011

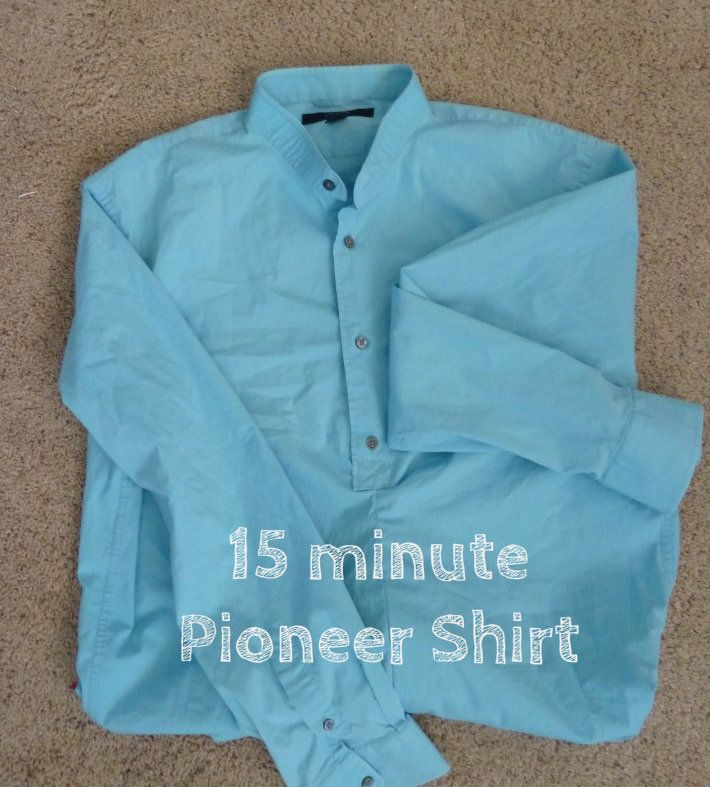
Man's/Boy's Shirt Tutorial (Simplified)

I found a Pioneer Man's Workshirt on line several years ago from The Mountain Man's Sketch Book and have made it in different sizes over the years.  I don't really need this size yet, but thought I'd make it so I could create a man's (or boy's) shirt tutorial.  I don't know if The Mountain Man's Sketch Book is a credible source. I haven't done my research.

From the get-go, you should know:

  • I found in trying it on myself that if I button it, it is rather choking!  If I unbutton it, and let the shirt fall to to the back, it fits more comfortably.  I'm surprised my little boy has never complained of the neck!  Maybe, though, the shirts he has worn were big enough on him that he didn't notice the ill fit.
  • I found this version of the pattern that seems to have more instructions and more of a neck cutting guide -- so it might be better than the version I used.  I'd like to try something from The Workwoman's Guide also, but thought I'd stick with something I was familiar with for now.  Perhaps I'll actually buy a pattern some day, but this will suffice for now.
  • The original pattern calls for a facing for the neck opening.  I've made it that way in the past, as well as tried some other methods, but this time I totally cheated -- you'll see. I didn't even use a facing.
  • You're also supposed to cut a slit in the sleeve for the wrist opening, but again I cheated for simplicity's sake and just left the arm seam open a few inches near the wrist.

The dimensions for this pattern at full size are on the downloads, but if you want to reduce the size, here are the dimensions:

75% (this is the size that almost fits me -- I'm about 5'4")         
Body          22.5" x 49", with the center 17" being reserved for attaching the sleeve (leaves 16" at either end)
Neck          7.5" wide maximum x 3" high maximum*
Neck slit    7.5" deep from the bottom of the neck curve
Sleeve        18" high x 20.5" wide -- the 20.5" is the part you gather)
Sleeve slit  5.25" in from the right edge of the sleeve when laid flat, cut 3.75" deep
Collar        17" x 3"*
Cuff           8.5" x 3"*
Facing

65% (boys' 7/8)   
Body          20" x 42", with the center 15" being reserved for attaching the sleeve (leaves 14" at either end)
Neck          6.5" wide maximum x 3" high maximum*
Neck slit    6.5" deep from the bottom of the neck curve
Sleeve        15.5" high x 18" wide -- the 18" is the part you gather
Sleeve slit  4.5" in from the right edge of the sleeve when laid flat, cut 3.25" deep
Collar        15" x 2.5"*
Cuff           7.5" x 2.5"*
Facing       3.25" x 8.25", with a slit cut 6.5" deep from the top

55% (5T)
Body          16.5" x 36", with the center 12.5" being reserved for attaching the sleeve (leaves approximately 12" at either end)
Neck          5.5" wide maximum x 2.5" high maximum*
Neck slit    5.5" deep from the bottom of the neck curve
Sleeve        13" high x 15" wide -- the 15" is the part you gather
Sleeve slit  4" in from the right edge of the sleeve when laid flat, cut 3" deep
Collar        12" x 2"*
Cuff           6" x 2"*
Facing       3" x 7", with a slit cut 5.5" deep from the top


* I'm sure you could keep your collar and cuffs bigger (keep the width the same, but increase the depth so that you have a bigger collar or cuff).  You could also leave your neck hole bigger, rather than reducing it.  Kids' heads are still really big in proportion to their bodies!


Here's how I did it:

1.  Cut or tear the fabric out according to the desired size.  Next time, I may try shifting my neck hole a couple inches to the front to see if that helps alleviate the choking neck line.  Any other suggestions?

2.  Run two gathering stitches (long straight stitches) along the edge of the sleeve (at 1/2" & 1/4").  Gather the sleeves down to fit the appropriate area on the shirt body (according to the pattern dimensions).  Attach the sleeve to the body, right sides together, with a straight stitch 1/2" from the edge of the fabric.  You can zig-zag the edge, or to be a little more authentic, just stitch a second straight stitch 1/8" again closer to the edge. 


3.  Fold the shirt in half and sew your side and underarm seams. I did not sew completely to the wrist, but stopped a few inches short to leave an opening in the seam for a wrist opening (I didn't want to have to bind wrist openings).  Again, you may also zig-zag your seam, or do a second row of straight stitching. 
Here are the few inches I left open in the seam:
I folded the raw edges under 1/4" and again 1/4" and pressed and stitched around the opening:
From the inside:

4.  Run two gathering stitches along the edge of the sleeve.  Pull threads to gather the edge of the sleeve down to fit just inside the wrist band (leave 1/4-1/2" of the wristband sticking out on either side of the gathered sleeve.).

Stitch at 1/2".

Press the wristband away from the sleeve.  Press the short side edges toward the wrong side and then press the long edge also toward the wrong side.
Fold the wristband in half and carefully press and pin.
Stitch along one short side of the wristband, along the long, open side, then along the other short side to close. 
 I made a loop with a button for the closure.
  Repeat on the other sleeve.

5.  Now it's time to finish the neck.  Instead of cutting a facing for the head/neck opening, I just cut away horizontally from the bottom of my vertical slice about 1/2" to either side.  (Looks like the bottom of an "I.")
I folded the fabric to the wrong side 1/4" and again 1/4" and pressed.
Then, I pulled the left side of the shirt directly over the right side of the shirt.
Then I secured the "pleat" with some backstitching.  I also stitched closed the fabric that was pulled to the inside so there wouldn't be a little tube on the inside of the shirt.  I've never done it this way, nor have I ever seen it done this way, but it was easy, and it will be interesting to see how it holds up.  When my little boy wears this shirt he is self-conscious of the shirt being open in the front.  This overlapping at least closes up the front of the shirt.

6.  Then I attached the collar just as I did the wristbands.  I used a button for the closure.  I've also used a tie on one shirt as well as a loop and a button on another.

7.  Hem the bottom.  I folded my hem to the wrong side probably 1/2", then again 1/2", pressed, then straight stitched.

LinkWithin

Related Posts with Thumbnails